Simple Mason Jar Centerpieces for Baby Shower Rose Gold
In this mail you lot can find a tutorial for DIY Mason Jar Centerpieces to apply and reuse at any celebration.
I love, love, dear doing crafts! That's how I saved a lot of money for my baby shower. I made a lot of decorations, food and most importantly, my centerpieces.
Centerpieces can exist expensive, especially if you accept a lot of tables to decorate. At my baby shower, well Baby-Q, I had 12 tables, then, to salvage money I made my centerpieces. Not but were they extremely affordable and fun to make, just they can be reused subsequently the baby shower for personal in-dwelling utilise or be gifted as favors for others to use in their homes.
Today, I am going to tell you exactly how I made my DIY mason jar centerpieces with the hopes of evoking inspiration for yours!
* This site may comprise affiliate links. To real the full disclosure, click here .
Where to buy your stonemason jars
I shopped around for mason jars at a lot of places, just I establish the best cost at Amazon.
The mason jars were delivered right to my doorstep, which saved my 7-months meaning-cocky the steps of carrying them from the store to the car, from the car to the house.
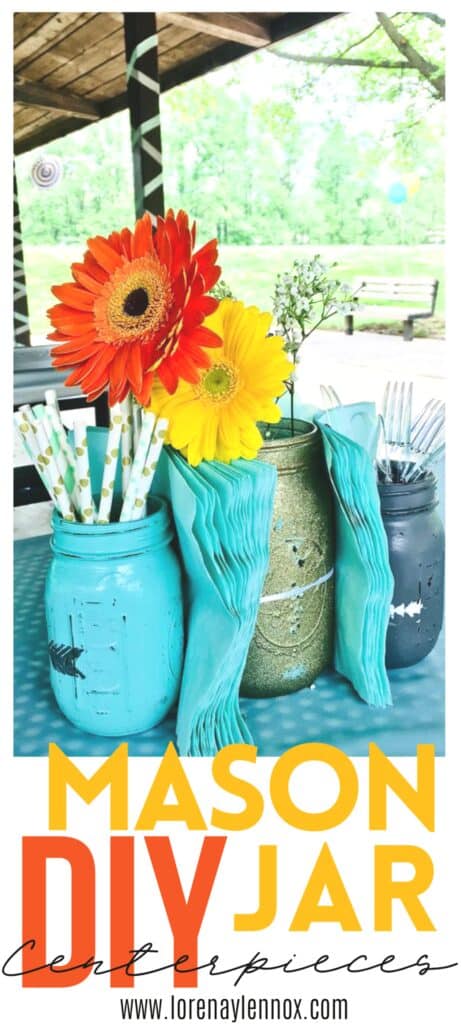
They come in different sizes, and since I had three colors for my infant shower (mint, grey, and gilded), I wanted to have iii bricklayer jars for each centerpiece. I bought twenty-four xvi oz mason jars and twelve 32 oz jars.
Let'south brand the DIY Stonemason Jar Centerpieces
The next step is picking out materials and colors.
I originally painted them all with acrylic paints but decided I wanted my gold jars to have some glitter to them. So I bought the Krylon Glitter Smash spray Paint. Equally for the acrylic paints. I tried a lot of different brands.
I initially tried the Martha Steward Multi-Surface Satin Acrylic paints. These colors were gorgeous; yet, they were too translucent. I tried a couple of other brands, just my favorite make was Apple Barrel. They paint smoothly onto the jars and only required two coats.
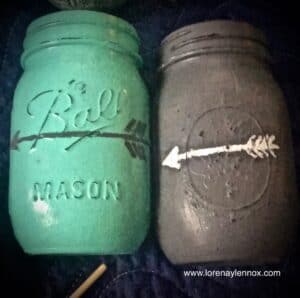
Next, I stenciled some of my jars with arrows.
This role can get catchy specially if y'all use very sparse stencils, as I did. My proposition would be to allow your jars to dry out completely for full 24 hours (acrylic can feel dry to the touch, merely if handled besides presently the pigment volition pare off), and so tape the stencil to the jar and with a very thin brush, pigment the color you want the stenciled area. Proceed the stencil on during the drying procedure—again a total 24 hours— before removing it.
Every bit you can see in my movie, I used too thick of a brush, and the paint went underneath the stencil. I also took the stencil off immediately, smearing some pigment. Later being disappointed at beginning, I grew to similar the imperfect wait of the arrows especially afterwards I sanded them.
The side by side step is my favorite, the sanding! Sand away every bit much equally you please to get a rustic look to your bricklayer jars. I did about of my sanding around the protruding designs of the stonemason jars.
Well, that's information technology for the painting and crafting of your centerpieces. I finished my centerpieces about a month earlier my political party, and I am glad I did because I coordinated the rest of my decorations around them.
What to practise with your DIY Mason Jar Centerpieces
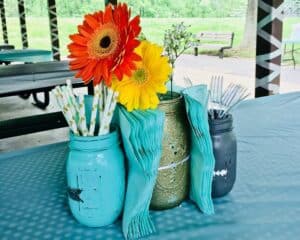
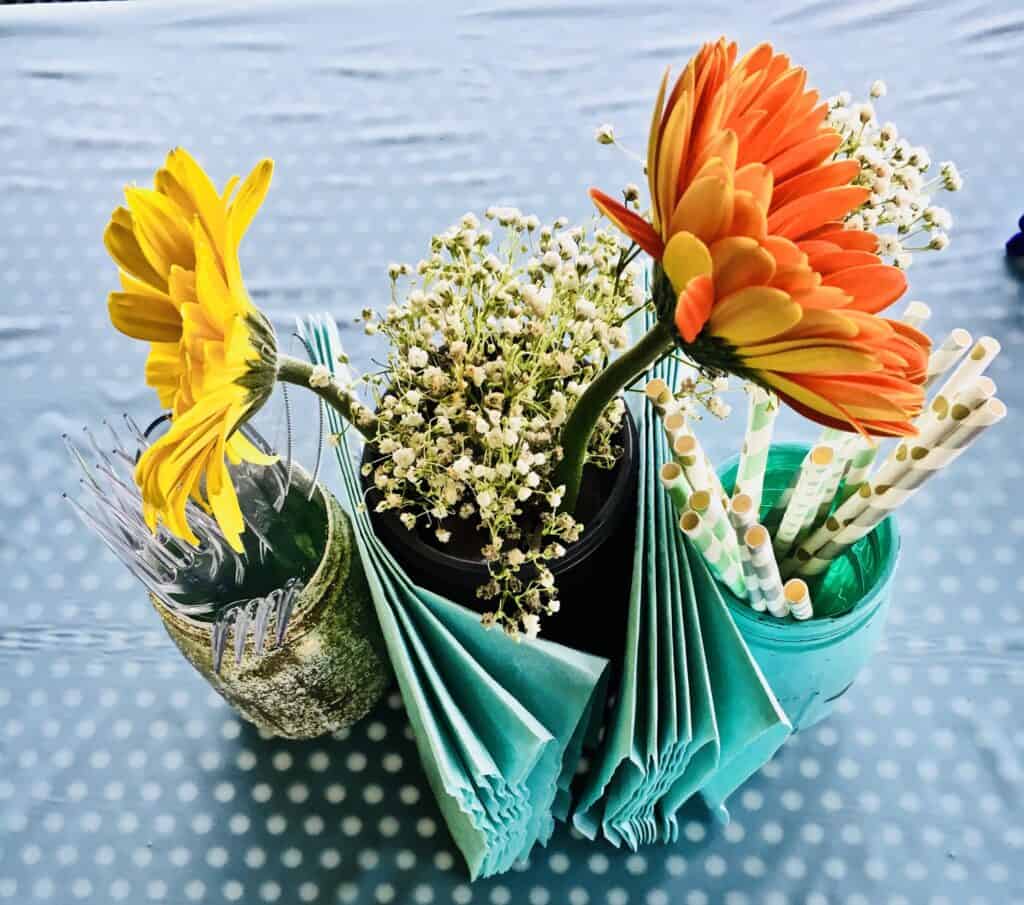
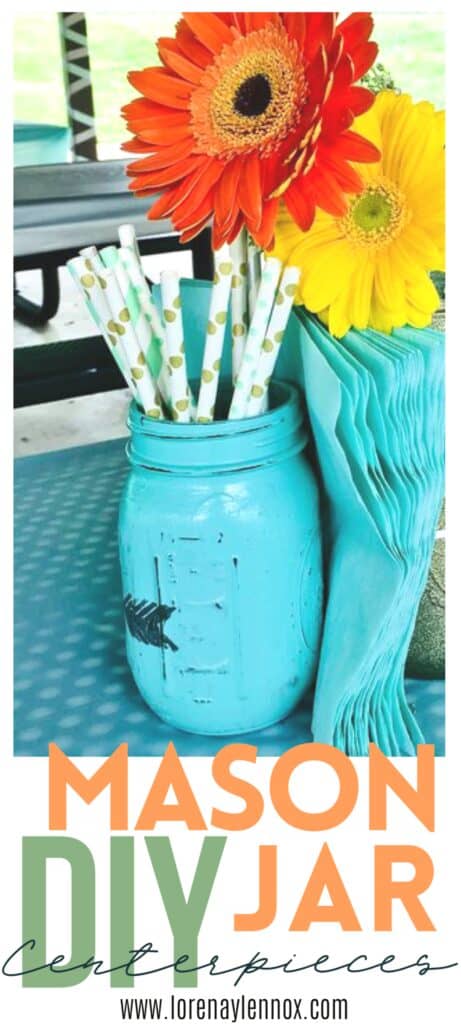
Your side by side step is to determine what you want to do with them. Practice you desire them to be decorations in the middle of the tabular array? Do you lot want to make use of them for storage of some sort? For mine, in my 32 oz. Jars I filled them with complimentary-colored flowers and Baby's breath.
In the xvi oz jars, I put actress utensils. I thought it would be convenient since I know I always forget silverware later on serving my food at parties. I also used the jars as napkin holders. It was windy out, and the weight of the jars kept the napkins in place.
There we have information technology.
The centerpieces aren't perfect but I think they are very appealing and bring some elegance to the Baby-Q. Now you might ask, what did you practise with all 36 jars? Well, some of my favorites I fabricated sure that as soon as I was done serving the food, I hid them for myself to keep.
To this day I utilise them equally flower pots, every bit toothbrush holders, pen holders and sometimes they become a toy for my exploring 17-month erstwhile. Some of them I gave away equally game prizes, and the left-overs I gave away to anybody that helped me make clean up at the end. It makes me happy going and visiting some of my friends and seeing my centerpieces there and seeing how they use them in their homes.
I really enjoyed doing this project, especially during the nesting stage of my pregnancy, and now I am glad I get to share them with you all =). I used this same concept for Lennox's offset birthday centerpieces. Stay tuned!

Simple Mason Jar Centerpieces for Baby Shower Rose Gold
Source: https://lorenaylennox.com/mason-jar-centerpieces/
0 Response to "Simple Mason Jar Centerpieces for Baby Shower Rose Gold"
Post a Comment